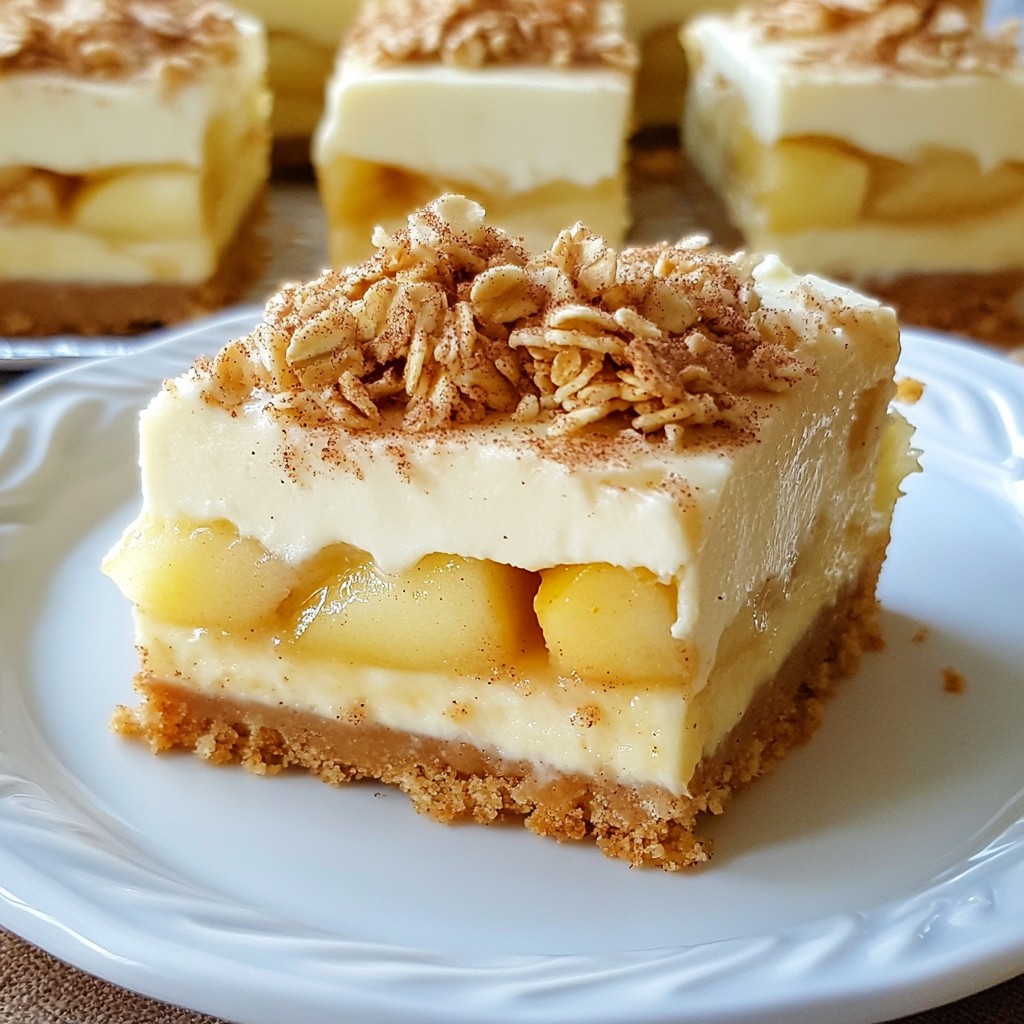
Are you ready for a sweet twist on a classic dessert? Apple Crisp Cheesecake Bars are the perfect blend of creamy cheesecake and crisp apple topping. This treat is easy to make and full of flavor. Whether you're hosting a party or craving something sweet at home, these bars will impress. Let’s dive into the simple steps, smart tips, and tasty variations that will make your baking experience a delight!
Why I Love This Recipe
- Delicious Flavor Combination: The blend of creamy cheesecake and spiced apples creates a delightful harmony of flavors that is hard to resist.
- Perfect for Any Occasion: These bars are versatile enough to be served at gatherings, holidays, or as a sweet treat for yourself!
- Easy to Make: This recipe is straightforward, making it accessible for bakers of all skill levels to enjoy.
- Beautiful Presentation: With a golden crisp topping and a drizzle of caramel, these bars are as pleasing to the eye as they are to the palate.
Ingredients
Complete List of Ingredients
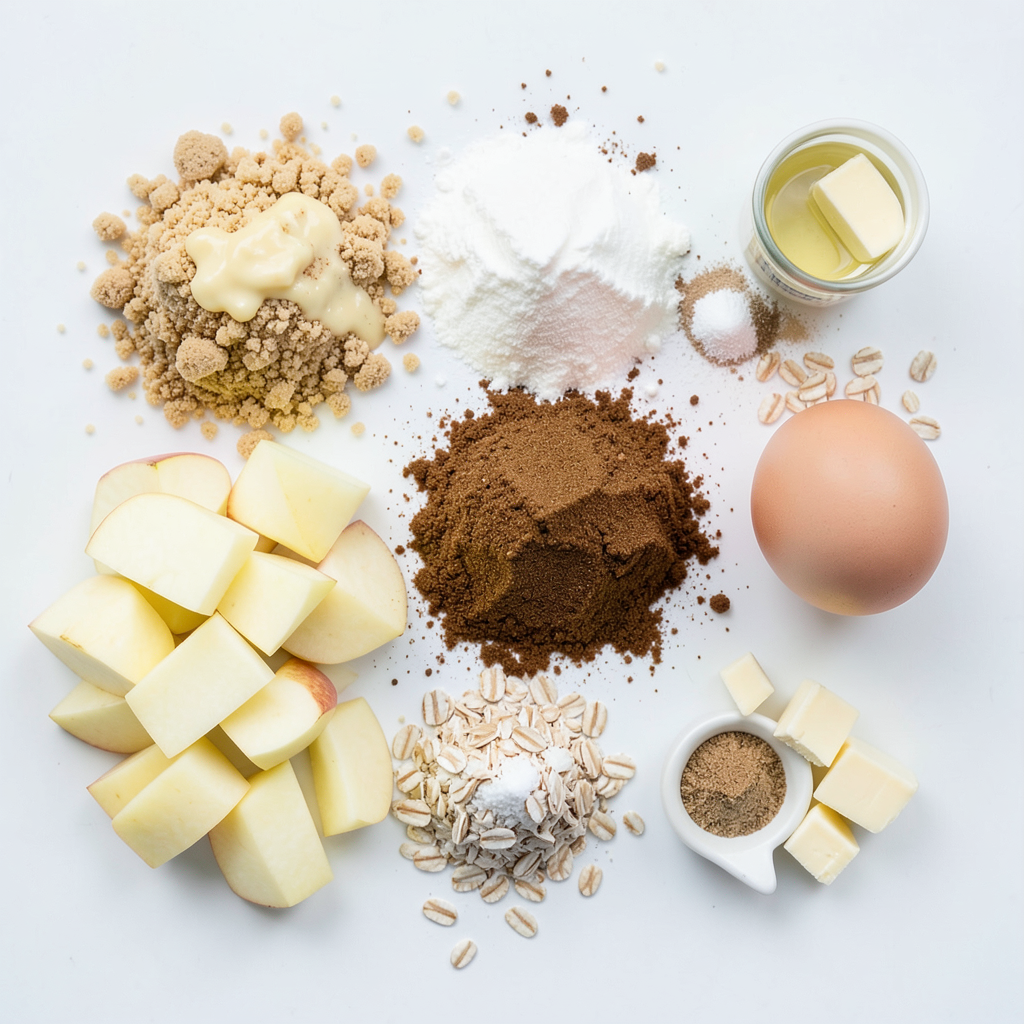
To make these Apple Crisp Cheesecake Bars, you will need:
- 1 ½ cups graham cracker crumbs
- ½ cup unsalted butter, melted
- 2 tablespoons granulated sugar
- 2 large apples, peeled, cored, and diced (about 2 cups)
- 1 teaspoon ground cinnamon
- ½ teaspoon ground nutmeg
- 2 tablespoons packed brown sugar
- 16 oz cream cheese, softened to room temperature
- ¾ cup granulated sugar (for filling)
- 1 teaspoon pure vanilla extract
- 2 large eggs
- 1 cup rolled oats
- ½ cup packed brown sugar (for topping)
- ½ cup all-purpose flour
- ½ teaspoon salt
- ½ teaspoon ground cinnamon (for topping)
- 4 tablespoons cold unsalted butter, diced
Ingredient Substitutions
You can swap some ingredients if needed. Use a gluten-free graham cracker for a gluten-free crust. For a dairy-free option, try using vegan cream cheese. You can also replace the apples with pears or peaches for a twist. If you don’t have vanilla extract, almond extract can work too. For a sweeter touch, use brown sugar instead of white sugar in the filling.
Tips for Choosing Fresh Apples
When picking apples, look for firm and shiny ones. Avoid apples with bruises or soft spots. Varieties like Granny Smith or Honeycrisp are great for baking. They hold their shape and add a nice tartness. If you can, smell the apple. A sweet scent often means great flavor. Fresh apples will make your bars taste amazing!
Step-by-Step Instructions
Preheating and Preparation
Start by preheating your oven to 350°F (175°C). Next, grab a 9x9-inch baking dish. Line it with parchment paper. Let some paper hang over the edges. This helps lift the bars out later.
Making the Crust
In a medium bowl, mix 1 ½ cups of graham cracker crumbs with ½ cup of melted unsalted butter and 2 tablespoons of granulated sugar. Stir until it looks even. Press this mixture firmly into the bottom of your baking dish. Bake for 10 minutes. Remove it from the oven and let it cool for a bit.
Cooking the Apples
Take 2 diced apples and put them in a skillet. Add 1 teaspoon of ground cinnamon, ½ teaspoon of nutmeg, and 2 tablespoons of brown sugar. Toss the apples to coat them. Cook on medium heat for about 5 minutes until they soften a little. Set them aside to cool.
Preparing the Cheesecake Filling
In a large bowl, beat 16 oz of softened cream cheese until creamy. Slowly add in ¾ cup of granulated sugar and 1 teaspoon of vanilla extract. Mix until smooth. Then, add 2 large eggs, one at a time. Make sure each egg is mixed in well before adding the next.
Assembling the Bars
Pour half of the cheesecake mixture over the cooled crust. Spread it evenly. Layer the cooked apples on top of this cheesecake layer. Finally, pour the rest of the cheesecake mixture over the apples. Smooth it out nicely.
Baking the Dessert
In a separate bowl, prepare the crisp topping. Mix together 1 cup of rolled oats, ½ cup of brown sugar, ½ cup of all-purpose flour, ½ teaspoon of salt, and ½ teaspoon of cinnamon. Add 4 tablespoons of diced cold butter. Mix it with your fingers or a fork until it looks like coarse crumbs. Sprinkle this topping evenly over the cheesecake layer.
Place the whole dish in the oven and bake for 45-50 minutes. The cheesecake should be set, and the topping will be golden brown. To check if it’s done, gently shake the pan. The center should not jiggle much.
After baking, let the bars cool completely at room temperature. For the best texture, chill them in the fridge for at least 4 hours or overnight. Once chilled, use the parchment paper to lift the bars out. Slice them into squares and enjoy!
Tips & Tricks
Perfecting the Cheesecake Texture
To get the best cheesecake texture, use room temperature cream cheese. Cold cream cheese makes it hard to mix smoothly. I use a hand mixer to whip the cream cheese until it’s creamy and fluffy. Beat in the sugar slowly. This helps to avoid lumps. Add eggs one by one, mixing well after each addition. This keeps the filling smooth and light.
Ensuring Even Baking
Baking the bars evenly is key. I always preheat my oven to 350°F (175°C) before starting. This ensures the bars bake at the right temperature. Place the baking dish in the center of the oven. This helps the heat circulate around the dish. Check the bars at 45 minutes. They should be set with a slight jiggle in the middle.
Serving Suggestions and Presentation
When serving, I like to lift the bars from the pan using the parchment paper. This makes cutting easier. Slice them into squares and place them on a nice platter. For a touch of flair, drizzle caramel sauce over the top. Adding a dollop of whipped cream makes it feel special. Garnish with thin apple slices for a fresh look. Enjoy!
Pro Tips
- Use Fresh Apples: For the best flavor and texture, opt for fresh, crisp apples like Granny Smith or Honeycrisp. They provide the perfect balance of sweetness and tartness.
- Chill the Bars: Allow the cheesecake bars to chill in the refrigerator for at least 4 hours, or overnight if possible. This helps the flavors meld and the texture set perfectly.
- Customize the Topping: Feel free to add nuts, like chopped pecans or walnuts, to the crisp topping for added crunch and flavor. Just mix them in with the oats and sugar.
- Drizzle with Caramel: For an extra indulgent touch, drizzle warm caramel sauce over the sliced bars before serving. It enhances the apple crisp flavor beautifully.
Variations
Alternative Fruit Options
You can play with different fruits in this recipe. Try using diced pears or fresh berries. Both options add unique flavors and textures. For a tropical twist, use diced mango or pineapple. These fruits blend well with the creamy cheesecake. You can mix and match to find your favorite. Each fruit brings its own charm to the bars.
Gluten-Free Version
To make these bars gluten-free, swap the graham cracker crumbs with gluten-free crumbs. You can find these at most stores. Use gluten-free all-purpose flour in the topping. This way, everyone can enjoy the treat. Just check the labels to ensure they are certified gluten-free. You can still keep the great taste while making it suitable for gluten-sensitive folks.
Vegan Modifications
For a vegan version, substitute the cream cheese with a plant-based cream cheese. You can replace the eggs with flaxseed meal or chia seeds mixed with water. Use 1 tablespoon of flaxseed meal mixed with 2.5 tablespoons of water for each egg. For the butter, use coconut oil or a vegan butter substitute. These changes keep the bars tasty yet plant-based. Enjoy the same delicious flavor while being kind to the planet!
Storage Info
Best Storage Practices
To keep your apple crisp cheesecake bars fresh, let them cool first. Once cool, cover the dish tightly with plastic wrap or foil. You can also place the bars in an airtight container. This keeps them moist and flavorful. Make sure to store them in the fridge for best results.
Freezing Instructions
If you want to save some bars for later, freezing works well. First, let the bars cool completely. Then, slice them into squares. Wrap each square in plastic wrap. Place them in a freezer-safe bag or container, leaving space for air. They can stay in the freezer for up to three months. To enjoy, thaw them in the fridge overnight before serving.
How Long They Last in the Fridge
In the fridge, these bars last about five to seven days. After that, their texture and flavor start to change. If you notice any changes, it's best to toss them. Enjoy these delicious treats while they are fresh!
FAQs
Can I make this recipe ahead of time?
Yes, you can make these bars a day ahead. They taste great when chilled. Just cool them completely before cutting. Store them in the fridge until you are ready to serve.
How do I know when the bars are done baking?
The bars are done when the cheesecake is set. Gently shake the pan; the center should not jiggle too much. The topping should also be golden brown. This usually takes about 45-50 minutes.
What is the best way to cut the bars?
First, let the bars cool completely. Use the parchment paper to lift them out of the pan. Then, use a sharp knife to slice them. Wipe the knife with a damp cloth between cuts for clean edges.
Can I use store-bought crust instead?
Yes, you can use store-bought crust. This saves time and effort. Just make sure it fits your 9x9-inch baking dish. Follow the package instructions for baking.
How can I ensure the cheesecake won't crack?
To prevent cracks, do not overmix the batter. Mix just until smooth. Bake at the right temperature and avoid opening the oven door too often. Cooling the bars slowly also helps.
This blog post covered everything you need for delicious cheesecake bars. We looked at fresh ingredients, step-by-step instructions, and smart tips for perfecting your dessert. You learned how to store and serve them, plus some fun variations. Remember, success lies in the details. Pay attention to ingredient choices and baking times. With care, you can make these bars your own. Enjoy sharing your tasty creation with friends and family!