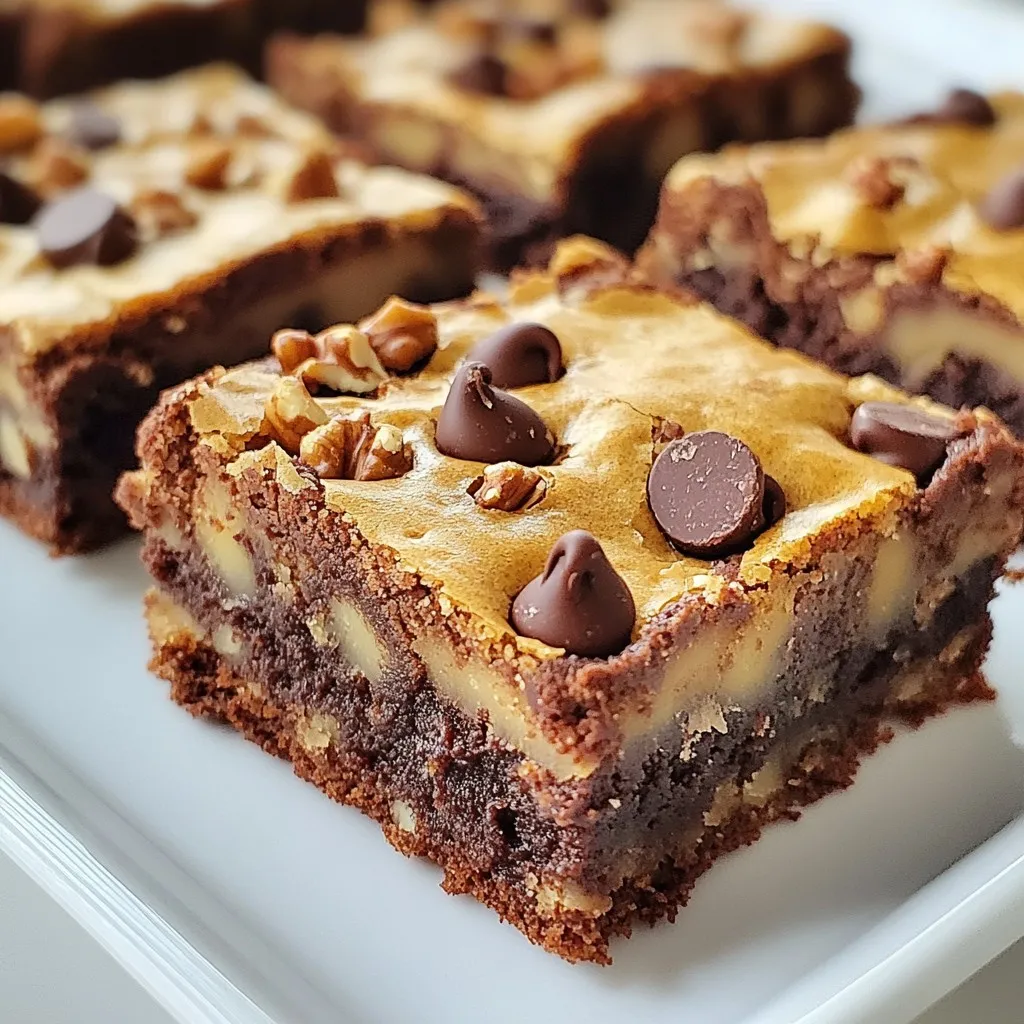
Are you ready to indulge in a treat that combines your favorite cookies and brownies? In this guide, I’ll share my delightful and easy recipe for Chocolate Chip Brookies. You’ll enjoy rich, gooey brownies topped with chewy chocolate chip cookies. Perfect for any occasion, they’re sure to impress friends and family alike. Let’s dive into the fun of baking these delicious treats together!
Why I Love This Recipe
- Decadent Flavor Combination: This recipe perfectly blends the rich, fudgy brownie with the chewy chocolate chip cookie, creating a dessert that satisfies every sweet craving.
- Easy to Make: With simple ingredients and straightforward steps, these brookies are accessible for bakers of all skill levels, making them a fun treat to whip up any time.
- Customizable Delight: You can easily switch up the toppings or add-ins, like nuts or different types of chocolate, allowing for endless variations to suit your taste.
- Perfect for Sharing: With about 20 servings, these brookies are ideal for gatherings, parties, or just sharing with friends and family, making everyone happy!
Ingredients
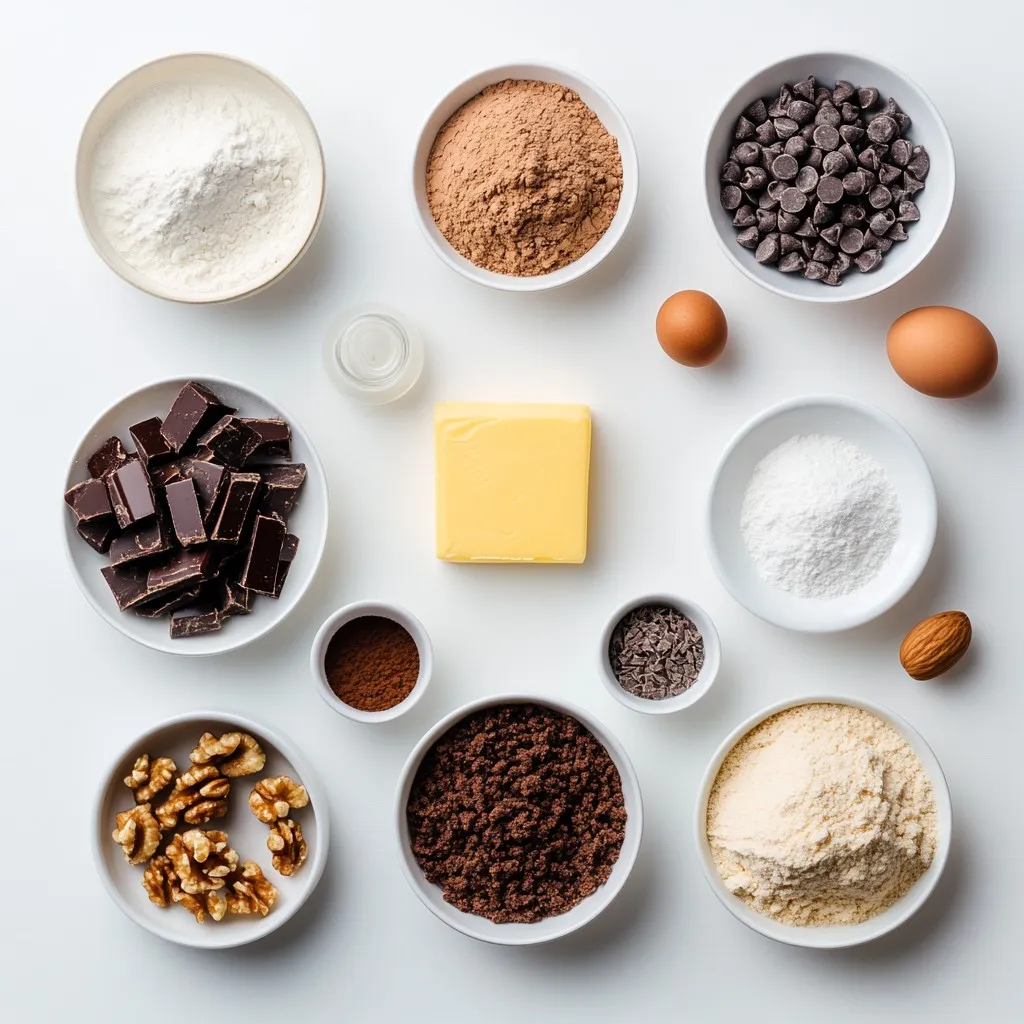
List of All Ingredients
To make Chocolate Chip Brookies, gather these ingredients:
– 1 cup unsalted butter, softened to room temperature
– 1 cup packed light brown sugar
– 1/2 cup granulated sugar
– 2 large eggs, at room temperature
– 1 teaspoon pure vanilla extract
– 2 1/2 cups all-purpose flour
– 1 teaspoon baking soda
– 1/2 teaspoon fine sea salt
– 1 cup semi-sweet chocolate chips
– 1 cup brownie mix
– 1/4 cup water
– 1/2 cup chopped walnuts (optional)
Butter vs. Margarine: What to Use
I always recommend using unsalted butter for these brookies. Butter gives a rich flavor. It helps achieve that perfect chewy texture. Margarine works too, but it lacks the same depth of taste. If you choose margarine, go for a high-quality brand. Still, butter is the star of this recipe!
Optional Add-ins: Nuts and Chocolates
You can customize your brookies with add-ins! Walnuts add a nice crunch. They also bring a warm, nutty flavor. If you love chocolate, try mixing in dark or white chocolate chips. You can even add a swirl of peanut butter for a fun twist. Experiment with your favorite flavors to make these brookies truly your own!
Step-by-Step Instructions
Prepping the Oven and Baking Pan
Start by preheating your oven to 350°F (175°C). This warm-up is key for even baking. Next, take a 9×13 inch baking pan. Line it with parchment paper, leaving some paper hanging over the edges. This helps with easy removal later.
Mixing the Cookie Dough Base
In a large bowl, cream 1 cup of softened unsalted butter with 1 cup of packed light brown sugar and 1/2 cup of granulated sugar. Mix until fluffy and lighter in color, about 3 to 5 minutes. Add 2 large eggs, one at a time, mixing well after each. Then stir in 1 teaspoon of pure vanilla extract.
In another bowl, whisk together 2 1/2 cups of all-purpose flour, 1 teaspoon of baking soda, and 1/2 teaspoon of fine sea salt. Gradually add this dry mix to the wet mix, stirring with a spatula. Avoid overmixing. Gently fold in 1 cup of semi-sweet chocolate chips and 1/2 cup of chopped walnuts if you like nuts.
Preparing the Brownie Layer
For the brownie layer, grab a separate bowl. Mix 1 cup of brownie mix with 1/4 cup of water. Whisk until smooth with no lumps. This step is simple but crucial for a rich brownie layer.
Assembling the Brookies
Now, take half of your cookie dough and spoon it into the lined baking pan. Spread it out evenly to create a solid base. Carefully pour the brownie batter over this layer, ensuring it covers all the cookie base. Finally, drop spoonfuls of the remaining cookie dough over the brownie layer. These clusters will bake up perfectly.
Baking Time and How to Check for Doneness
Place the pan in your preheated oven. Bake for 30 to 35 minutes. The edges should turn a golden brown. To check, insert a toothpick into the center. It should come out with a few moist crumbs, not wet batter. Once done, let the brookies cool for about 15 minutes in the pan. Lift them out using the parchment paper and transfer to a wire rack for full cooling. Once cool, slice into squares and enjoy!
Tips & Tricks
Achieving the Perfect Texture
To get brookies with a great texture, follow these steps:
– Use room temperature butter. This helps it mix well.
– Don’t overmix the dough. Mix until just combined.
– Bake until the edges are golden brown. This gives a nice firm base.
– Let them cool before cutting. This helps them set.
How to Store Leftover Brookies
Store leftover brookies in an airtight container. They can stay fresh for about four days. If you want them to last longer, freeze them. Wrap each piece in plastic wrap. Then place them in a freezer bag. They can last up to three months in the freezer.
Best Practices for Mixing Ingredients
When mixing, always start with the wet ingredients. Cream the butter and sugars until fluffy. Then add eggs one at a time. This keeps the mixture smooth. When you add the flour, mix slowly. Stir gently to keep air in the dough. This gives your brookies a nice lift.
Troubleshooting Common Issues
If your brookies turn out too dry, check your flour amount. Too much flour can dry them out. If they are too gooey, they might need a bit more baking time. Use a toothpick to check the center. If it comes out wet, bake a little longer.
Pro Tips
- Use Room Temperature Ingredients: Make sure your butter and eggs are at room temperature before starting. This helps create a smoother batter and ensures even mixing.
- Don’t Overmix the Dough: When combining the wet and dry ingredients, mix just until incorporated. Overmixing can lead to tough brookies.
- Check for Doneness: To avoid overbaking, start checking the brookies a few minutes before the recommended baking time. A toothpick should come out with a few moist crumbs.
- Cool Completely Before Slicing: Allow the brookies to cool fully in the pan before slicing. This helps them set and makes for cleaner cuts.
Variations
Using Different Types of Chocolate Chips
You can change the chocolate chips in brookies for fun. Use dark chocolate chips for a richer taste. Milk chocolate chips add sweetness. For a twist, try white chocolate chips or even peanut butter chips. Mixing different types gives great flavor and texture.
Gluten-free Alternatives
If you want gluten-free brookies, choose a gluten-free flour blend. Many brands offer mixes that replace all-purpose flour. Make sure your brownie mix is gluten-free too. This way, everyone can enjoy these sweet treats without worry.
Adding Flavor Enhancements (e.g., Espresso, Mint)
For extra flavor, think about adding espresso powder. Just a teaspoon boosts the chocolate flavor. You can also use mint extract for a fresh twist. A little goes a long way. These small changes can make your brookies unique and exciting!
Storage Info
Best Storage Practices
To keep your chocolate chip brookies fresh, store them in an airtight container. This helps maintain their soft texture. You can layer them with parchment paper to avoid sticking. Keep the container in a cool, dry place. They will last for up to a week.
Freezing Brookies for Later Use
You can freeze brookies for future treats. First, let them cool completely after baking. Then, cut them into squares. Wrap each square in plastic wrap. Place the wrapped squares in a freezer bag. They can last up to three months in the freezer. When you’re ready to enjoy, simply thaw them at room temperature.
Reheating Tips for Enjoyable Leftovers
To reheat brookies, preheat your oven to 350°F (175°C). Place the brookies on a baking sheet. Heat them for about 5 to 7 minutes. This warms them up and revives their soft texture. You can also use a microwave for quick reheating. Just heat for 10 to 15 seconds. Enjoy your warm, gooey brookies!
FAQs
What are Chocolate Chip Brookies?
Chocolate chip brookies are a mix of cookies and brownies. They combine the chewy texture of cookies with the fudgy richness of brownies. You get two desserts in one! The cookie dough layer sits below the brownie layer. Topped with chocolate chips, they are a crowd-pleaser.
Can I use different brownie mixes?
Yes, you can use any brownie mix you like. Each mix will change the flavor and texture a bit. Try different brands to find your favorite. You can also make homemade brownie batter if you want a personal touch.
How long do Chocolate Chip Brookies last?
Chocolate chip brookies will stay fresh for about a week. Store them in an airtight container. They taste best within the first few days. If you want them to last longer, try freezing them.
What’s the difference between cookies and brookies?
Cookies are usually soft and chewy or crisp, while brookies have both cookie and brownie layers. Brookies have a unique texture from the combination. This mix gives you the best of both worlds. They are also thicker than standard cookies.
Can I make these brookies vegan?
Yes, you can make vegan brookies! Substitute the butter with vegan butter. Use flax eggs or applesauce in place of regular eggs. Check that the brownie mix is vegan-friendly. With these swaps, you still enjoy the same great taste!
You learned how to make delicious Chocolate Chip Brookies. We covered ingredients, choices between butter and margarine, and fun add-ins like nuts. You now know how to prepare, mix, and bake your brookies to perfection. Plus, I shared storage tips and tasty variations to try.
Remember, small changes can make a big difference. Enjoy experimenting with flavors and techniques. Your homemade brookies will surely impress family and friends. Happy bakin