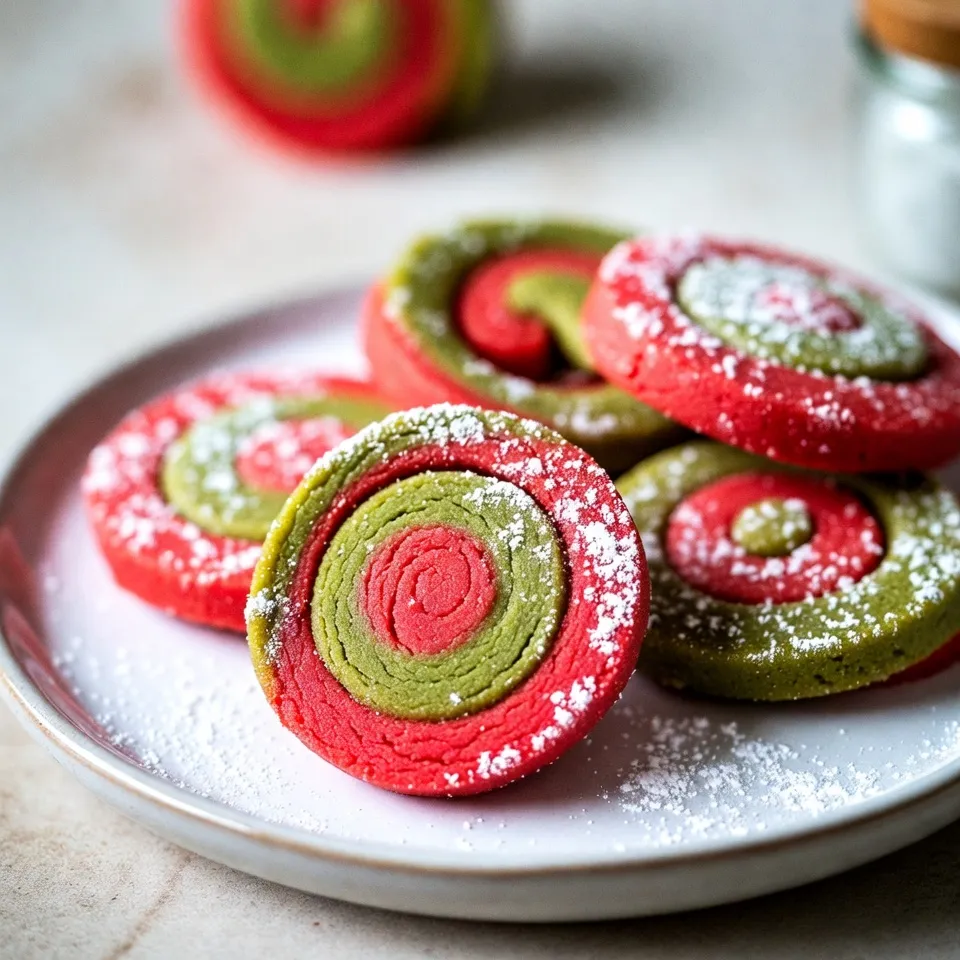
Get ready to spread some festive cheer with my Christmas Pinwheel Cookies recipe! These vibrant, swirl-patterned treats are not just a feast for the eyes, but are also easy to make. With simple ingredients and a fun rolling technique, you’ll create cookies that bright up any holiday gathering. Let’s dive into this fun recipe and elevate your holiday baking game!
Why I Love This Recipe
- Festive Appearance: These colorful pinwheel cookies are not only delicious but also visually stunning, making them a perfect addition to any holiday celebration.
- Fun to Make: The process of rolling and slicing the dough is a fun activity that can involve the whole family, creating lasting memories in the kitchen.
- Customizable Flavors: You can easily tweak the flavor by adding different extracts or using colored dough that matches your holiday theme.
- Perfect for Gifting: These cookies make a delightful gift when packaged in festive boxes, spreading joy and sweetness to friends and family.
Ingredients
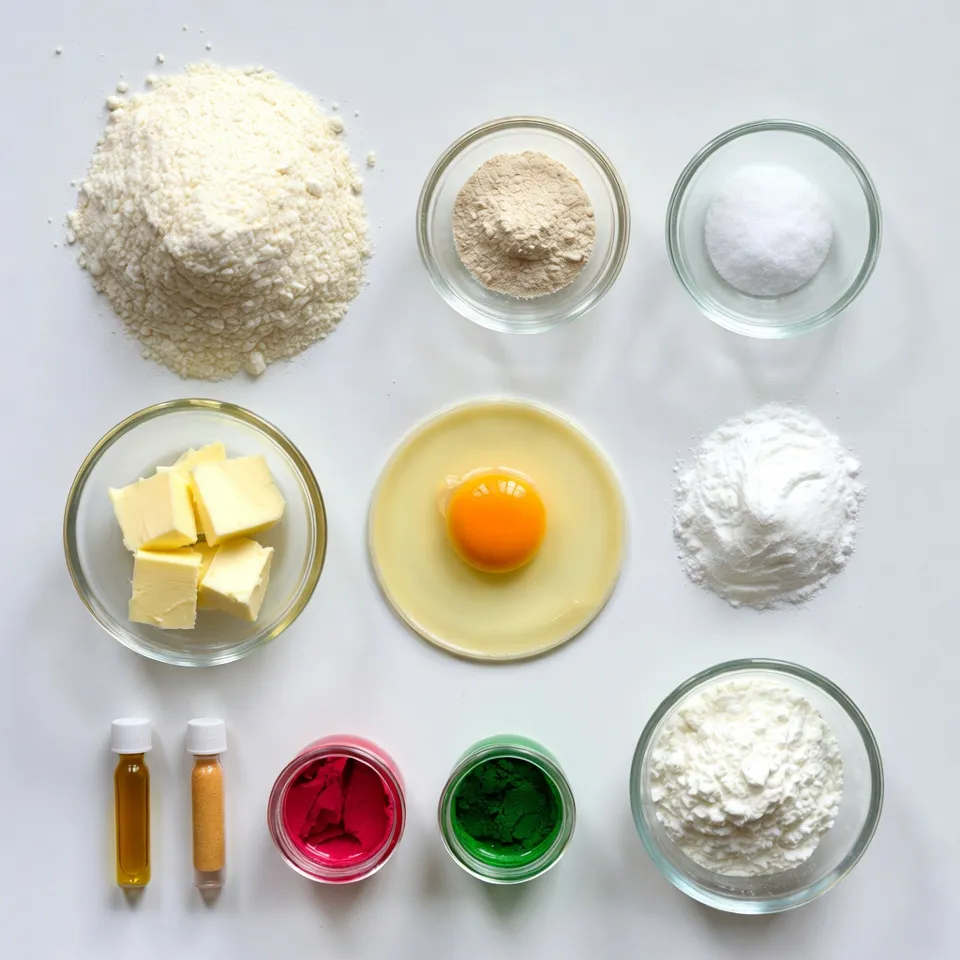
To make Christmas pinwheel cookies, you need these simple ingredients:
– 2 ¾ cups all-purpose flour
– 1 teaspoon baking powder
– ½ teaspoon salt
– 1 cup unsalted butter, softened
– 1 cup granulated sugar
– 1 large egg
– 1 teaspoon vanilla extract
– 1 teaspoon almond extract
– ½ cup red food coloring
– ½ cup green food coloring
– ½ cup powdered sugar (for dusting)
These ingredients create a sweet and colorful cookie that brightens any holiday table. The all-purpose flour gives the cookies structure, while the butter adds richness. Granulated sugar offers sweetness, and the egg binds everything together. Vanilla and almond extracts provide lovely flavor notes.
The vibrant red and green food coloring is what makes these cookies festive. You can also dust them with powdered sugar for a snowy finish. Each ingredient plays a key role in making these cookies not just tasty, but also fun to look at!
Step-by-Step Instructions
Preparation of Cookie Dough
1. Start by whisking together the flour, baking powder, and salt in a medium bowl. Mix well and set it aside.
2. In a large bowl, cream together the softened butter and granulated sugar using an electric mixer. Beat until the mix is light and fluffy, about 3-4 minutes.
3. Add the egg, vanilla extract, and almond extract to the butter-sugar mix. Mix on low speed until fully combined.
4. Gradually add the dry mix to the wet mix. Stir on low speed until just combined. Be careful not to overmix.
5. Divide the dough into two equal balls. Leave one ball plain and color the other with red food coloring. Mix well.
6. Take the plain dough and add green food coloring. Mix until the color is evenly spread.
Forming the Pinwheel
1. Lay out two sheets of parchment paper on your workspace. Place each colored dough on separate sheets.
2. Roll each dough into a rectangle about ¼ inch thick using a rolling pin.
3. Carefully peel off the top layer of parchment from the red dough. Place the uncolored dough on top, then set the parchment back down.
4. Start rolling the dough from one end to form a tight log. Wrap the log in parchment paper. Chill it in the fridge for at least 2 hours.
Baking the Cookies
1. Preheat your oven to 350°F (175°C). Line a baking sheet with parchment paper.
2. After chilling, take the dough out of the fridge. Use a sharp knife to slice the log into rounds about ¼ inch thick.
3. Place the cookie slices on the baking sheet, leaving space between each.
4. Bake for 8-10 minutes, or until the edges are lightly golden. Keep an eye on them to avoid over-baking.
5. Let the cookies cool on the baking sheet for 5 minutes, then move them to a wire rack to cool completely.
Tips & Tricks
Achieving the Perfect Dough
Chilling your dough is key. It helps the cookies hold their shape. If you skip this step, your cookies may spread too much. Wrap the dough tightly and chill it for at least 2 hours. For the best taste, chill it overnight.
Avoid overmixing your dough. When you mix too much, the cookies can become tough. Mix just until you see no flour. This keeps them soft and chewy.
Decorating Ideas
Dust your cookies with powdered sugar before serving. This adds a lovely touch and makes them look festive. Use a small sieve for an even coat.
For a fun presentation, serve the cookies on a bright platter. Add small sprigs of evergreen or candy canes around them. This makes your table look cheerful and inviting.
Pro Tips
- Chill Time is Key: Allowing the dough to chill for at least 2 hours helps to firm it up, making it easier to slice into perfect rounds.
- Use Parchment Paper: Rolling the dough between parchment sheets prevents sticking and makes it easier to transfer the rolled log to the refrigerator.
- Watch the Oven: Keep an eye on the cookies while they bake; they can go from perfectly golden to overbaked quickly.
- Festive Presentation: Dust the cookies with powdered sugar just before serving for an extra festive appearance and sweetness.
Variations
Flavor Enhancements
You can make Christmas Pinwheel Cookies even more fun. Adding spices like cinnamon or nutmeg gives a warm taste. Mix in about a teaspoon of either spice into your dough. It adds depth and a cozy feel to your cookies.
Using different food colors can also change the look. You can create blue and silver cookies for a winter theme. Just swap the red and green for blue food coloring. You can also create swirls by mixing colors together. This makes each cookie unique!
Dietary Adjustments
If you need gluten-free options, use gluten-free flour. You can find blends that work well in cookies. Just replace the all-purpose flour with an equal amount of gluten-free flour.
For vegan substitutes, swap the butter for vegan butter. Use a flax egg to replace the large egg. To make a flax egg, mix one tablespoon of ground flaxseed with three tablespoons of water. Let it sit for five minutes to thicken. This keeps your cookies plant-based and tasty!
Storage Info
How to Store Cookies
To keep your Christmas pinwheel cookies fresh, store them at room temperature.
– Use an airtight container.
– Place parchment paper between layers of cookies to avoid sticking.
– Keep them in a cool, dry place.
You can also freeze cookies for longer storage.
– Wrap each cookie in plastic wrap.
– Place wrapped cookies in a freezer bag or airtight container.
– They can last up to three months in the freezer.
Shelf Life
For the best taste, eat your cookies within one week.
– Store them in their container at room temperature.
– Check for freshness by feeling their softness.
Signs that cookies have gone stale include:
– A dry or hard texture.
– Loss of flavor or scent.
– Unpleasant odors.
Stay on top of your cookie storage to enjoy them longer!
FAQs
Can I make the dough ahead of time?
Yes, you can make the dough ahead of time. Prepare the dough and chill it as directed. Then, wrap it tightly in plastic wrap. Store it in the fridge for up to 3 days. You can also freeze it for longer storage. Just remember to thaw it in the fridge before rolling and baking.
How do I prevent the cookies from spreading too much?
To stop cookies from spreading, chill the dough well before baking. Chilling firms up the butter, which helps keep the shape. Use parchment paper on the baking sheet for easy removal. Also, make sure not to overwork the dough, as this can lead to extra spreading.
What other colors can I use for pinwheel cookies?
You can use any color food coloring you like! Try blue for winter or yellow for spring. You can even mix colors for fun patterns. Be creative and use natural colors like beet juice or matcha for different shades.
Can I use margarine instead of butter?
Yes, you can use margarine instead of butter. However, the taste and texture may change slightly. Choose a stick margarine for best results. Softened margarine should blend well with sugar, just like butter.
Creating pinwheel cookies is fun and easy. We covered all the steps, from mixing dough to rolling it. You learned how to make colorful cookies and store them for later. Remember, chilling the dough is key for the best results. Try adding spices or different colors for a twist. With these tips, your cookies will impress everyone. Enjoy baking and sharing your tasty creation