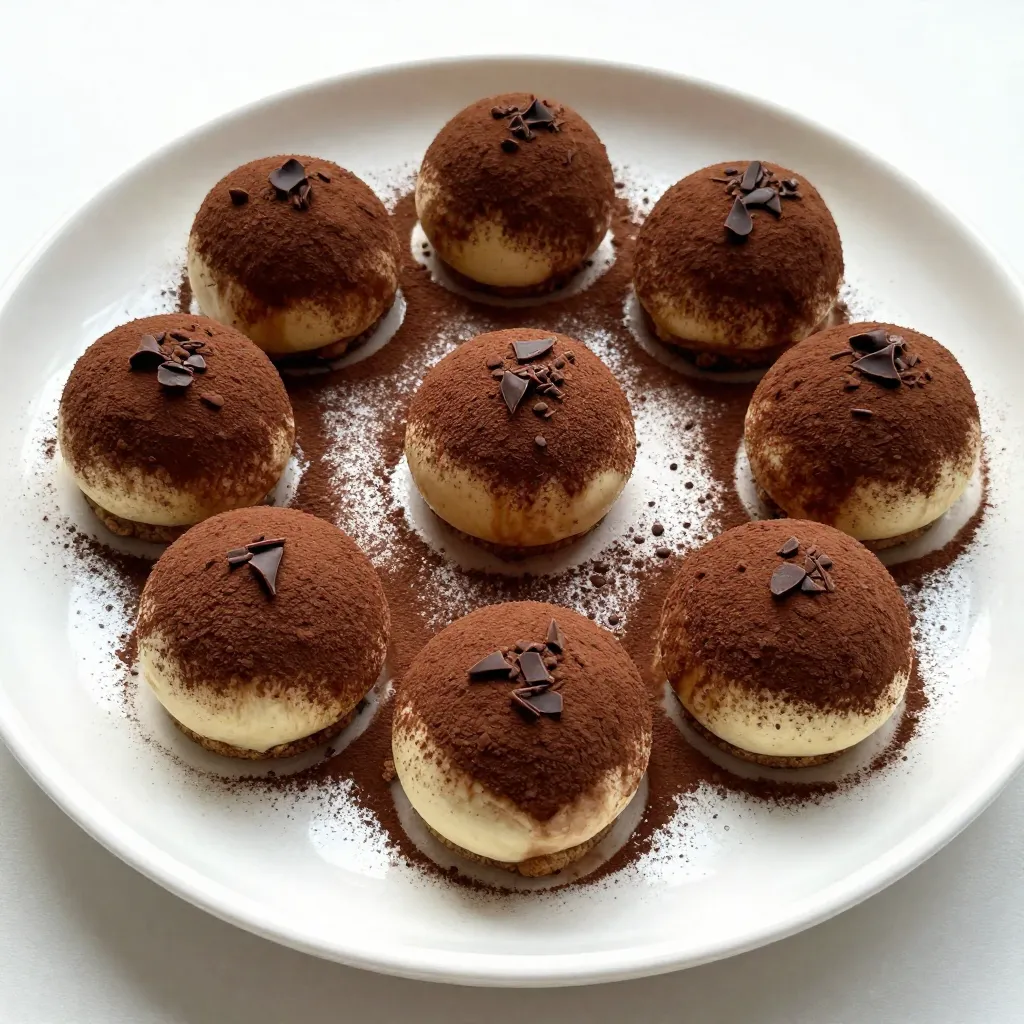
If you’re in the mood for something sweet but don’t want to bake, you’re in the right place! These No-Bake Tiramisu Truffles are simple, quick, and oh-so-delicious. Imagine rich coffee, creamy filling, and a hint of chocolate—all in bite-sized treats you can enjoy anytime. Follow along as I guide you through easy steps and tips to create these delightful truffles. Let’s get started on this tasty journey!
Why I Love This Recipe
- Effortless Delight: These no-bake tiramisu truffles are incredibly easy to make, requiring minimal effort but delivering maximum flavor, making them a perfect dessert for any occasion.
- Rich Flavor Profile: The combination of mascarpone, cream cheese, and coffee creates a luxurious, creamy texture with a delightful coffee kick that truly captures the essence of traditional tiramisu.
- Customizable Treat: You can easily adjust the sweetness or coffee strength according to your taste, allowing you to create a dessert that perfectly suits your preferences.
- Impressive Presentation: These truffles not only taste amazing but also look stunning when garnished with cocoa powder and dark chocolate shavings, making them a show-stopping dessert for gatherings.
Ingredients
List of required ingredients
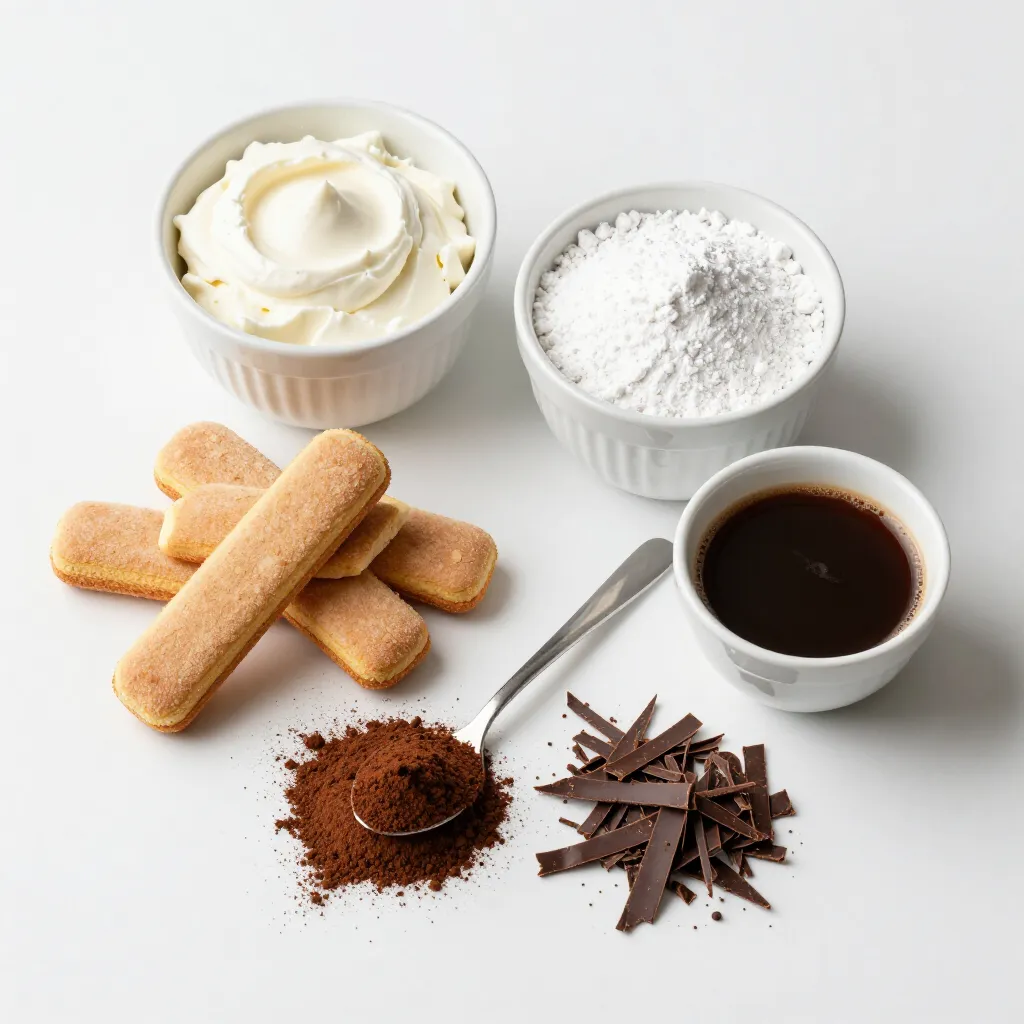
To make your no-bake tiramisu truffles, gather these key ingredients:
– 1 cup mascarpone cheese
– 1 cup cream cheese, softened at room temperature
– 1/2 cup powdered sugar
– 1 cup ladyfinger cookies, finely crushed
– 1/2 cup brewed coffee, cooled to room temperature
– 1 tablespoon cocoa powder (for coating)
Optional ingredients for enhanced flavor
To add extra flavor, consider these optional ingredients:
– 1 tablespoon espresso powder (for a richer coffee flavor)
– Dark chocolate shavings (for garnish)
Notes on ingredient substitutions
If you can’t find mascarpone cheese, you can use cream cheese as a substitute. Use a mixture of cream cheese and sour cream for a creamy texture. If you want a lighter version, try Greek yogurt instead of cream cheese. For a gluten-free option, look for gluten-free ladyfinger cookies or use crushed gluten-free cookies.
Step-by-Step Instructions
Detailed mixing instructions
Start with a big bowl. Add 1 cup of mascarpone cheese and 1 cup of cream cheese. Make sure the cream cheese is soft. Next, add in 1/2 cup of powdered sugar. Use a hand mixer to beat this mix. Set your mixer on medium speed. Keep mixing until it is smooth and creamy. You want no lumps in this mix.
Now, take 1 cup of ladyfinger cookies and crush them finely. Gradually add this to your creamy mix. Stir well to blend it in. Then, slowly drizzle in 1/2 cup of cooled brewed coffee. Mix as you pour. If you want a stronger coffee taste, add 1 tablespoon of espresso powder. Keep mixing until the dough is firm but a bit sticky.
Forming and chilling the truffles
Once your mix is ready, it’s time to form the truffles. Wash your hands, then scoop out about 1 tablespoon of the mixture. Roll it gently into a smooth ball. Place each truffle on a baking sheet lined with parchment paper. Make sure to leave space between them.
After forming all the truffles, put the baking sheet in the fridge. Let them chill for at least 30 minutes. This will help them firm up nicely.
Coating and garnishing tips
When the truffles are firm, take them out of the fridge. For a rich finish, roll each truffle in cocoa powder. Make sure they get a nice coating. This gives them that classic tiramisu flavor.
For a special touch, sprinkle dark chocolate shavings on top. This adds a beautiful look and extra taste to your truffles. Enjoy making these delightful treats!
Tips & Tricks
Techniques for perfect truffles
To make perfect tiramisu truffles, start with room-temperature cheese. This helps them mix smoothly. Use a hand mixer for a creamy texture. Beat the mascarpone and cream cheese until they are smooth. Gradually add the crushed ladyfingers. This step gives the truffles their unique texture. When adding coffee, pour slowly to avoid a runny mix. The dough should be firm but slightly sticky.
Common mistakes to avoid
One common mistake is using cold cheese. Cold cheese makes it hard to mix. Another mistake is not chilling the truffles long enough. If they are too soft, they won’t hold their shape. Also, avoid over-mixing; it can make the truffles dense. Lastly, don’t skip the cocoa powder coating. It adds flavor and a nice look.
Serving suggestions and presentation tips
For a lovely presentation, arrange the truffles on a stylish plate. A circular pattern looks nice. Lightly dust the plate with cocoa powder for an elegant touch. You can also add dark chocolate shavings on top for a special finish. Serve with a side of brewed coffee to enhance the flavor. This makes a delightful pairing for your guests.
Pro Tips
- Chill the Ingredients: To achieve a firmer texture for your truffles, consider chilling the mascarpone and cream cheese for about 10 minutes before mixing. This helps them combine more easily.
- Customize the Flavor: Feel free to experiment with flavored coffee or liqueurs such as Kahlúa or Amaretto for a unique twist on the traditional tiramisu taste.
- Use Quality Ingredients: The quality of the mascarpone and coffee significantly affects the flavor of these truffles. Opt for fresh, high-quality brands for the best results.
- Make Ahead: These truffles can be prepared a day in advance. Store them in an airtight container in the refrigerator, allowing the flavors to meld beautifully overnight.
Variations
Flavor variations (e.g., adding liqueurs)
You can enhance your tiramisu truffles by adding liqueurs. Try adding 1-2 tablespoons of coffee liqueur. This adds depth and richness. If you like a fruity twist, use orange liqueur instead. Both options brighten the flavor.
Dietary adaptations (vegan, gluten-free options)
Making these truffles vegan is easy. Swap the mascarpone and cream cheese for vegan cream cheese. Use a plant-based whipped cream instead of regular cream. For gluten-free, choose gluten-free ladyfinger cookies. Always check labels to ensure they fit your diet.
Seasonal variations (holiday-themed additions)
You can make these truffles festive with seasonal twists. For winter holidays, add a pinch of nutmeg or cinnamon to the mix. In summer, try adding fresh fruit puree for a refreshing touch. Each season brings a new chance to create!
Storage Info
Best practices for storing truffles
Store your no-bake tiramisu truffles in an airtight container. Use parchment paper between layers to avoid sticking. Keep the container in the fridge for the best taste. This helps maintain their creamy texture and flavor.
Shelf life and freezing tips
These truffles last about one week in the fridge. If you want to keep them longer, you can freeze them. In the freezer, they stay good for up to three months. Make sure to wrap them well in plastic wrap and then place them in a freezer-safe bag.
How to properly thaw frozen truffles
To thaw frozen truffles, move them to the fridge for several hours or overnight. Avoid thawing them at room temperature. This keeps them from becoming too soft. Enjoy them cold for the best taste experience!
FAQs
Can you use regular cream cheese instead of mascarpone?
Yes, you can use regular cream cheese. It will make the truffles a bit tangier. If you want a creamier texture, use half mascarpone and half cream cheese. This mix keeps the rich taste of tiramisu.
How long do no-bake tiramisu truffles last in the fridge?
These truffles will last about five days in the fridge. Store them in an airtight container. This keeps them fresh and tasty.
Can I make these truffles in advance?
Yes, you can make these truffles ahead of time. They taste even better after chilling overnight. Just keep them in the fridge until you’re ready to serve.
What can I use instead of ladyfinger cookies?
If you can’t find ladyfinger cookies, use sponge cake or graham crackers. Crush them finely and mix them in. This keeps the texture light and airy.
How do I get the best coffee flavor in my truffles?
To enhance the coffee flavor, use strong brewed coffee. Adding espresso powder boosts the taste too. Make sure the coffee is cooled before mixing it in. This helps blend the flavors well.
You now have all the tools to make delicious truffles. We covered ingredients, mixing steps, and tips for success. Remember, variations can make your truffles stand out. Store them properly to enjoy later. With practice, you’ll avoid common mistakes and impress everyone with your treats. I hope you feel ready to create your own tasty truffles. Enjoy the process and have fu